Auto Transcription
Zoom Live Transcripts (Live Captions)
Zoom has released a new live captioning feature called Live Transcripts, which has been enabled on all MCPHS accounts by default.
We strongly recommend enabling live transcripts for all meetings you are hosting to ensure they are accessible. This will also benefit any attendees that may be experiencing audio issues during the meeting.
Starting Live Transcripts During a Meeting
Please note: Only the host can turn auto/live transcriptions on or off.
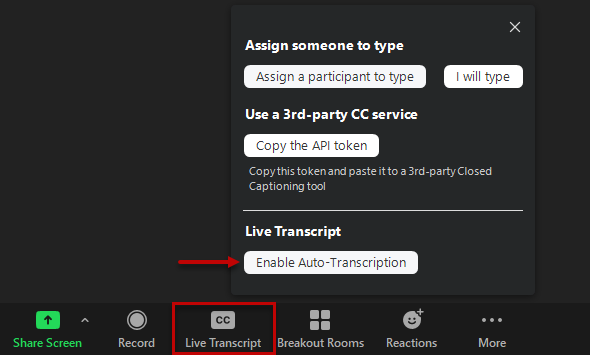
- Once you've started the meeting, click on the Live Transcript button from the Zoom control bar
- At the bottom of the window that appears, click on Enable Auto-Transcription
- The meeting host will automatically see the transcripts at the bottom of the Zoom meeting window. Attendees may need to turn on showing subtitles following the steps below.
- Once the host has enabled Live Transcripts, additional settings will then be available for the host and attendees. To access these settings, click on the arrow/carrot on the Live Transcript button from the Zoom control bar.
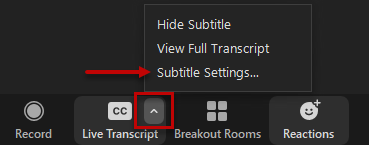
- The various settings available are:
- Show Subtitle or Hide Subtitle
- The transcript will appear as video subtitles at the bottom of the Zoom meeting window. Selecting hide will hide subtitles from being displayed.
- View Full Transcript
- This will show the transcript in a side-panel Transcript window. In this window, attendees can search for text within the transcript as well as saving the full transcript.
- Subtitle Settings
- This allows participants to change the appearance of subtitles.
- Show Subtitle or Hide Subtitle